Plan & Projection
Projection Process — Kitchen Manager Tutorial Guide
Role: Kitchen Manager (KM)
As a KM, your role in the projection process is to book student & staff headcounts per school, confirm projections, capture picking quantities, and record actuals after cooking.
Projection plans move through four states:
- Planned — Awaiting admin approval
- Open — KM books projections per school
- Active — Confirmed, proceed to cook
- Closed — Actuals captured
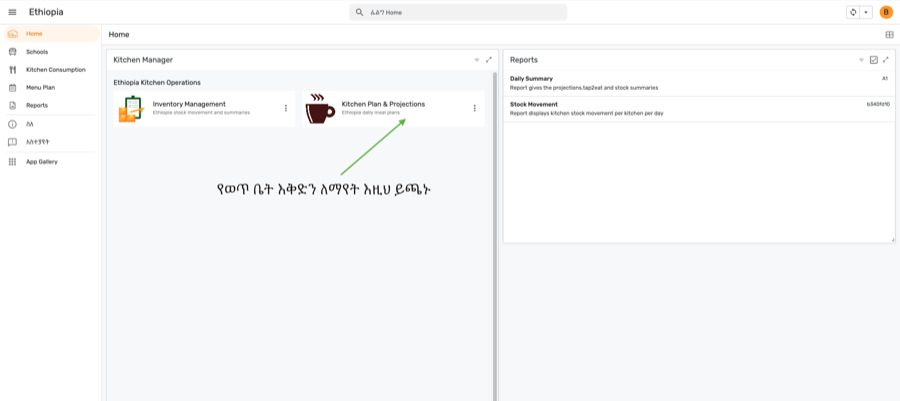
Step 1 — Navigate to Projections
- From Home → Kitchen Manager → Projections.
- This view shows all projection plans for your kitchen grouped by week and meal type.
Planned — Plan is generated; KM cannot edit yet. Awaiting admin to open. Open — KM can book projections per school. Fill in headcounts. Active — KM has confirmed. Picking list available. Proceed to cook. Closed — Actuals captured. Plan is finalized.
Step 2 — Open a Projection for Editing
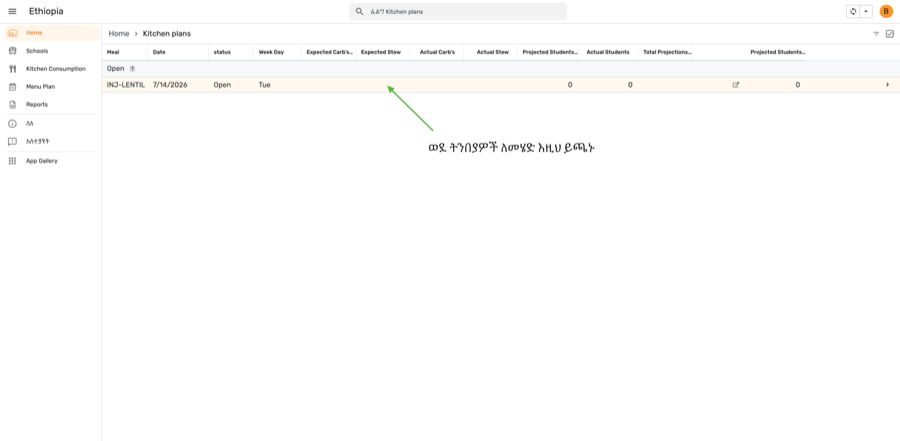
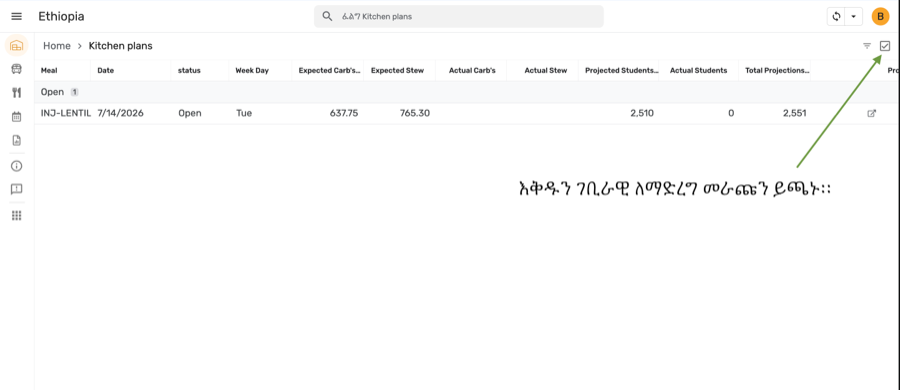
- In my_plans, find a row with status: Open.
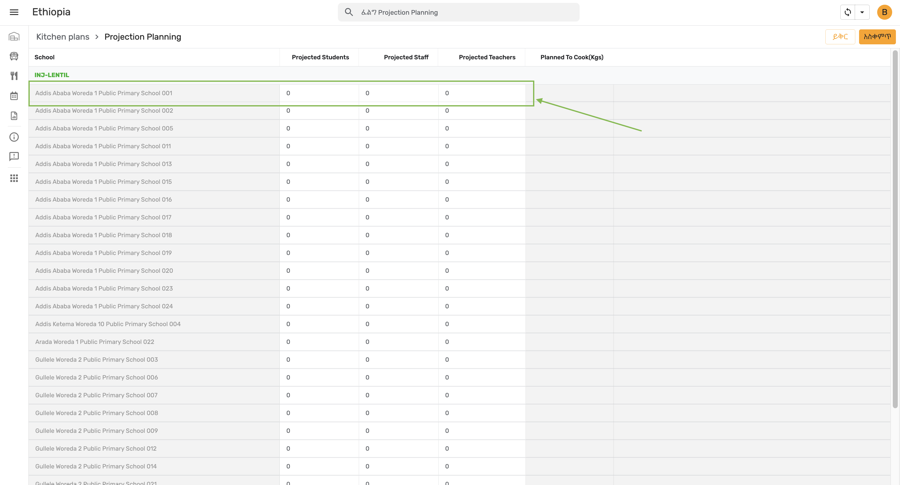
- Tap the row to open the Projection Planning inline view.
- You will see all schools listed with their current headcount fields.
Step 3 — Fill in Projected Students, Staff & Teachers
- For each school row: enter Projected Students, Staff, and Teachers inline.
- Planned To Cook auto-calculates from the headcounts you enter.
- Tap Save after filling all school rows.
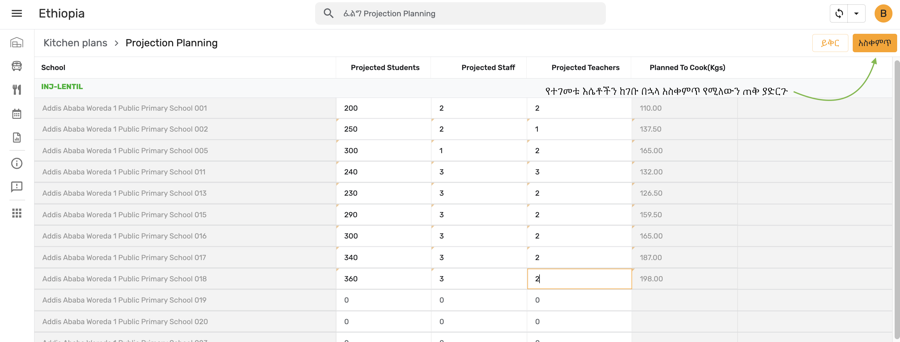
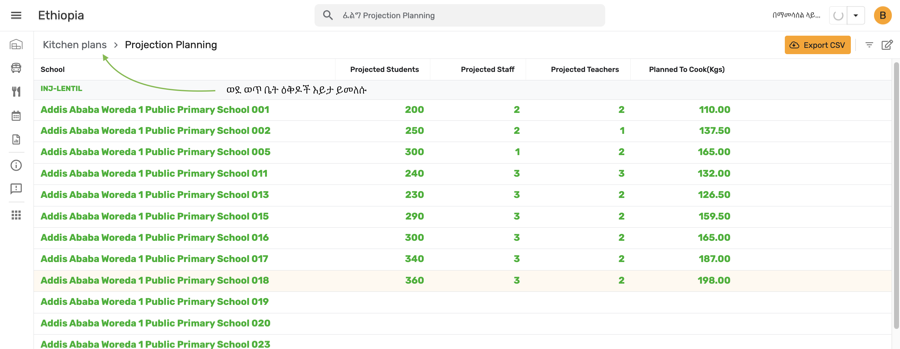
Planned To Cook is automatically calculated — do not edit this field directly. It updates as you enter student and staff counts.
Step 4 — Confirm Plan & Projections
- Navigate back to my_plans.
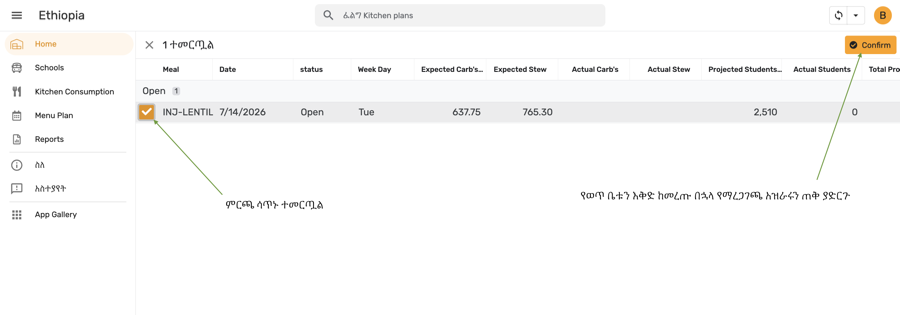
- Select the projection plan checkbox.
- Tap the Confirm Projections button.
- A confirmation dialog will appear — read it and confirm to proceed.
| Action | What it does |
|---|---|
| CONFIRM PROJECTIONS | Confirms all school headcounts and moves the plan from Open → Active. Stock picking becomes available. |
Once confirmed, the plan status changes to Active and projections are locked. Ensure all school headcounts are correct before confirming.
Step 5 — View the Active Plan
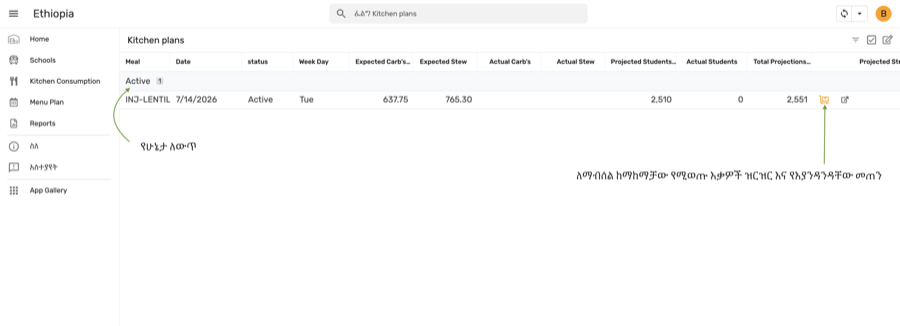
- The plan status is now Active — the Open tab will no longer show this plan.
- Switch to the Active tab to see your confirmed plan.
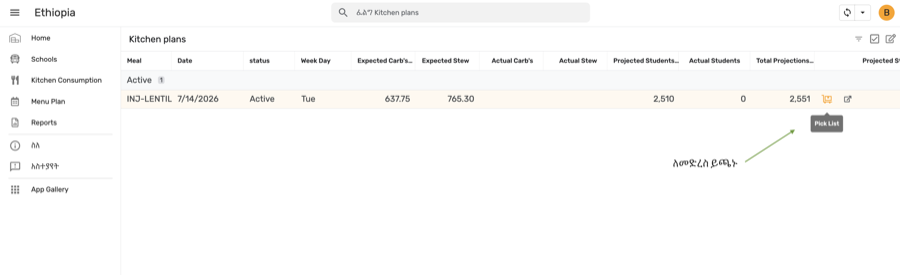
- Swipe right on the plan row to reveal the Picking List (cart icon).
Step 6 — Complete the Picking List
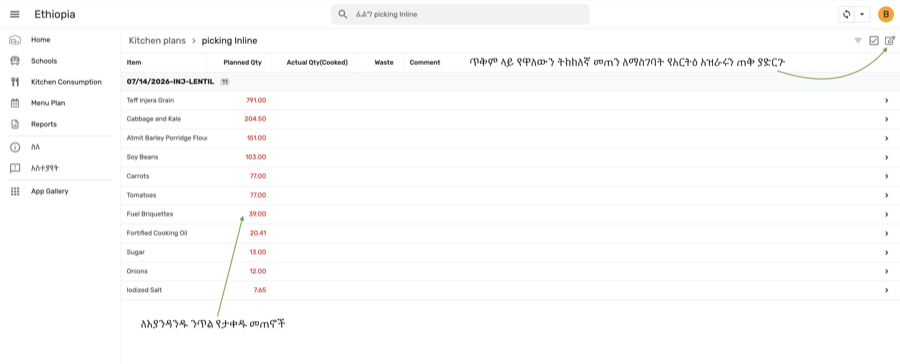
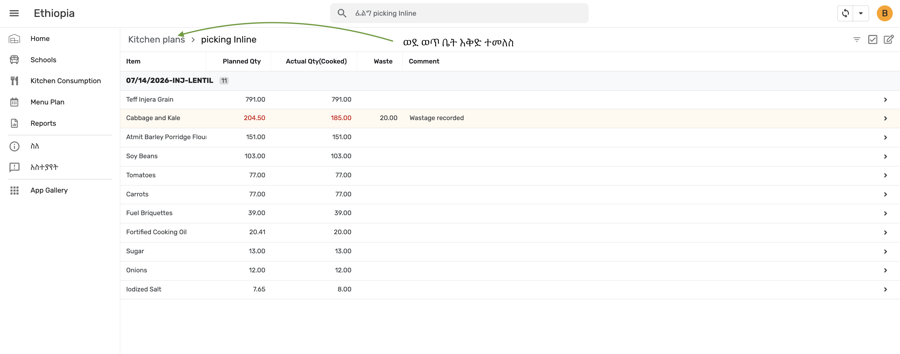
- Tap the cart icon to open the Picking List (Home > My Kitchen > my_plans > picking inline).
- Items are grouped by type: Utility, Stock (dry goods), and Non Stock (fresh produce).
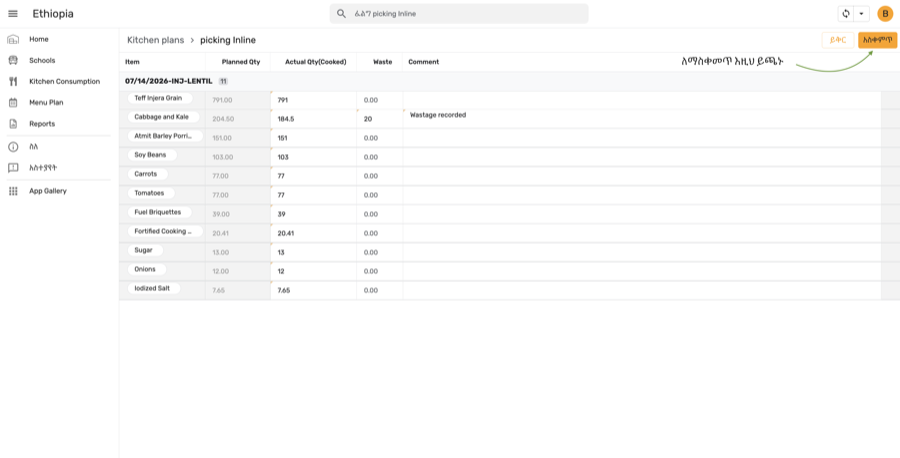
- For each item, enter the Actual Qty (Cooked). Add Waste and Reason if there was any wastage.
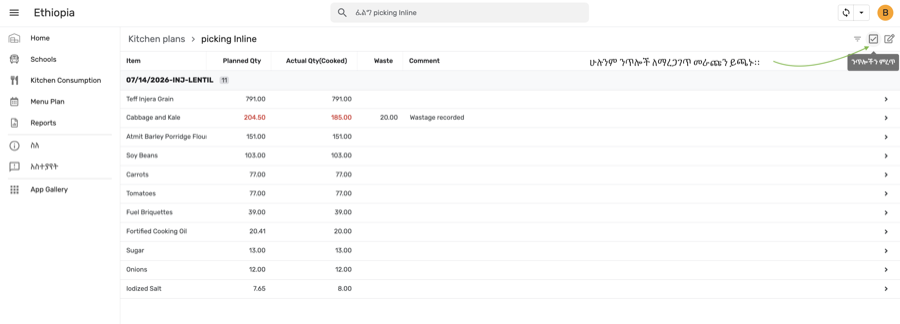
- Select all picking rows → tap Pick to mark items as picked.
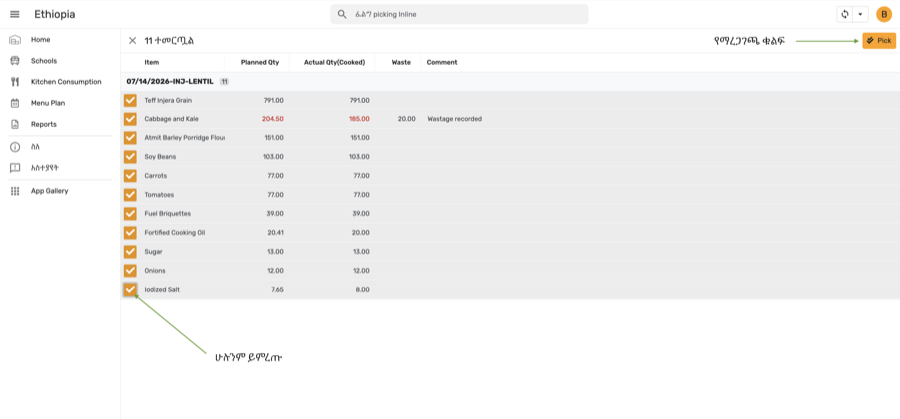
| Action | What it does |
|---|---|
| PICK | Marks all selected items as Picked. Updates each picking row status from pending to Picked. |
Stock items (Rice, Beans, Oil, Salt) come from warehouse issuances. Non-stock items (Cabbage, Turmeric, Tomatoes, etc.) are sourced separately and must also be recorded here.
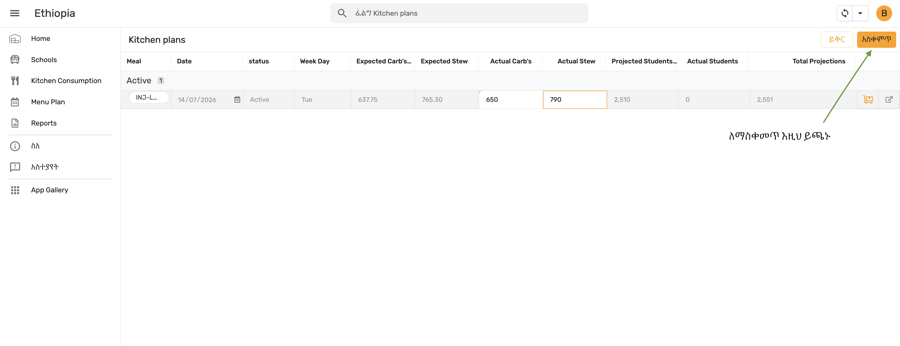
Step 7 — Update Actual Yield in Kitchen Plans
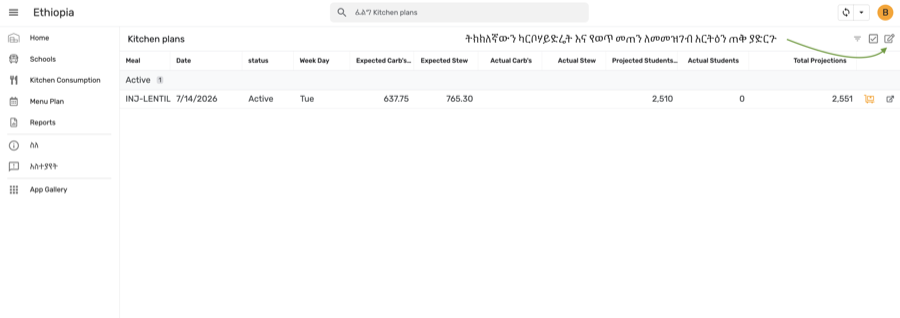
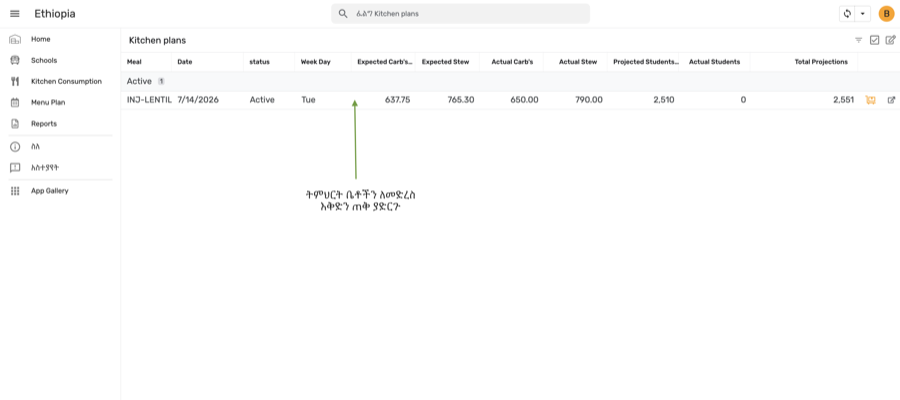
- Navigate back to Kitchen Plans (Home > Kitchen Plans), filtered to status: Active.
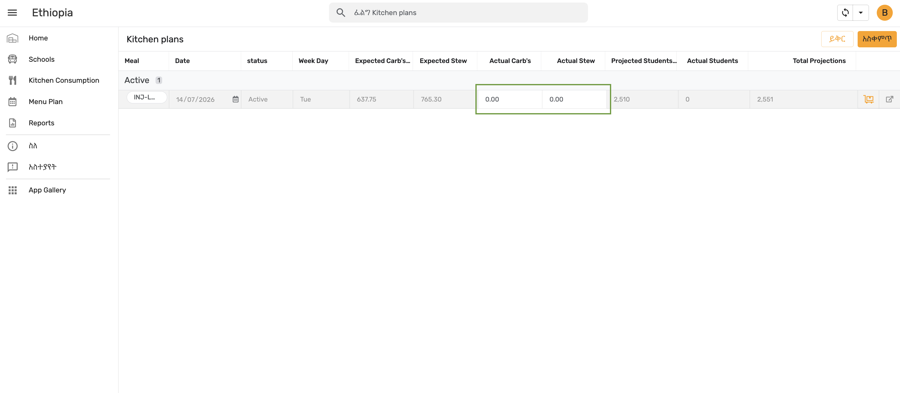
- Tap the edit (pencil) icon in the top-right to open Quick Edit mode.
- Fill in Actual Stew and Actual Carb's for the plan row.
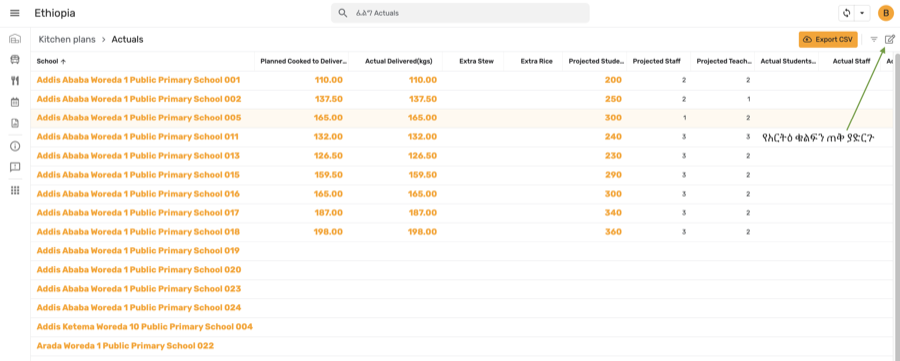
Step 8 — Fill in Actuals per School
- Tap the plan row to open the Actuals view (Home > Kitchen Plans > Actuals).
- Swipe right to see all actual fields: Actual Students, Actual Staff, Actual Teachers.
- Also fill: Missed, loaves, milk, Food Remaining, and any comment — please indicate where necessary.
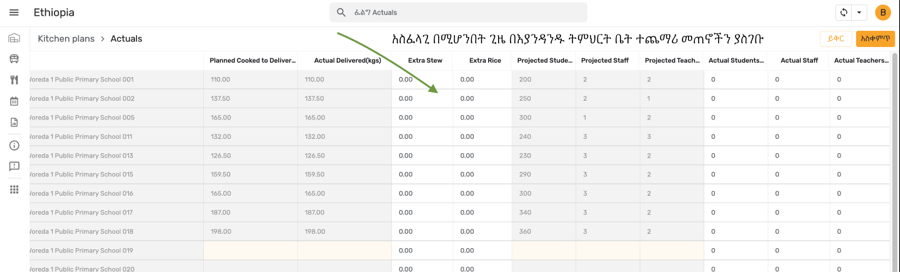
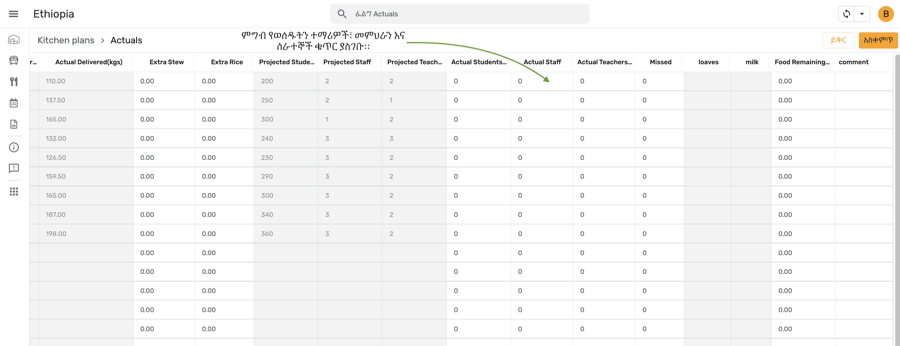
Step 9 — Save Actuals
- After filling all actual fields for each school row, tap Save (orange button, top-right).
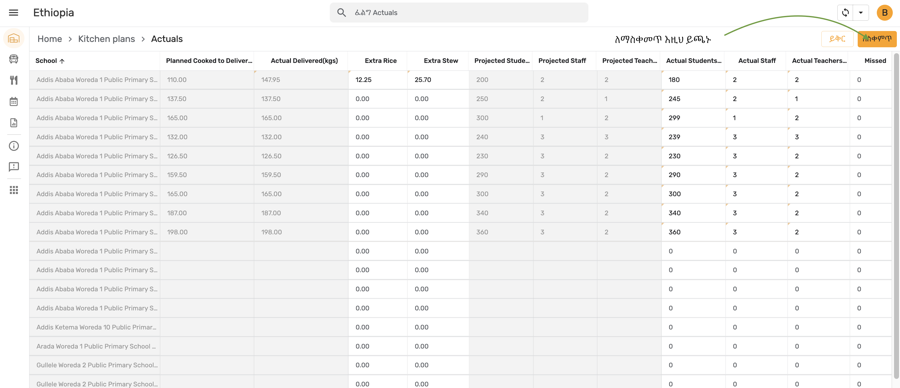
The Actuals view shows both projected and actual counts side by side — use Projected Students/Staff/Teachers as a reference while entering actuals.
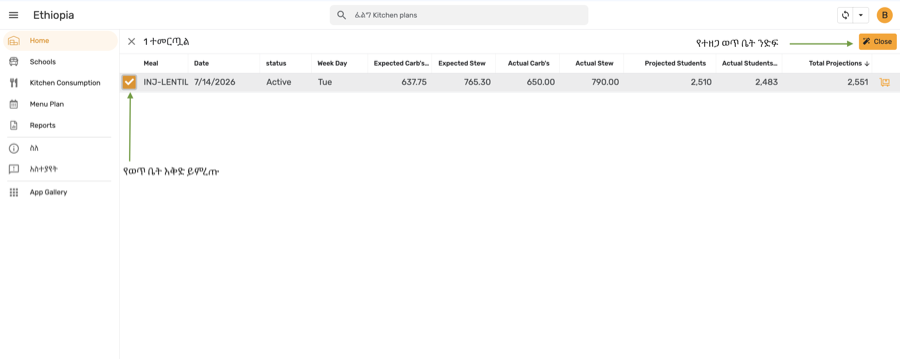
Step 10 — Close the Plan
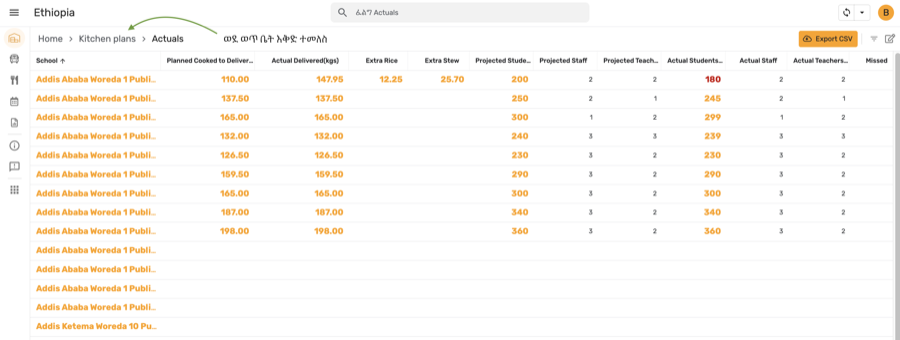
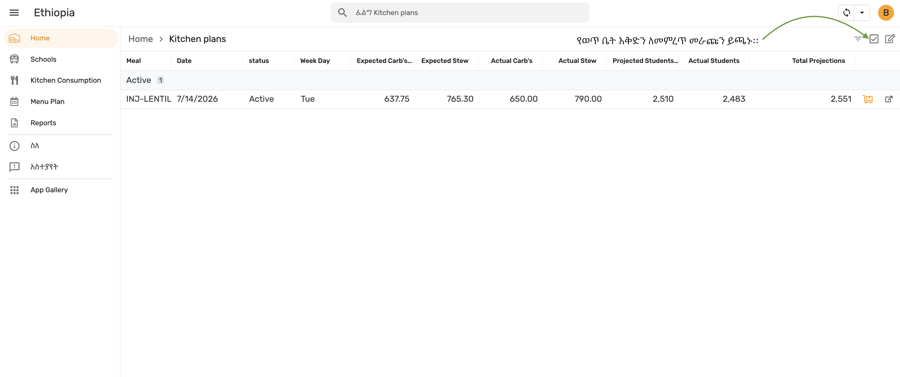
- Navigate back to my_plans (Kitchen Plans, filtered status: Active).
- Select the plan row checkbox (1 Selected will appear at the top).
- Tap the orange Close button — this finalises the plan and moves it to Closed status.
| Action | What it does |
|---|---|
| CLOSE | Closes the projection plan. Status moves from Active → Closed. Plan is finalized — no further edits are possible. |
Only close a plan after all actuals have been saved. A Closed plan cannot be re-opened.
Projection Status Flow Reference
| Status | Meaning |
|---|---|
| Planned | Plan generated by admin. KM cannot edit yet. |
| Open | KM fills projected students & staff per school. |
| Active | Confirmed. Picking list available. Cook. |
| Closed | Actuals captured. Plan finalized. |